Green Witch

I just love Halloween. It’s my favourite holiday and I’m always so sad that we don’t celebrate much in the UK.

This is the album I made last Halloween, and I absolutely love it ๐Ÿ’œ๐Ÿฆ‡๐ŸŽƒ๐Ÿ‘ป

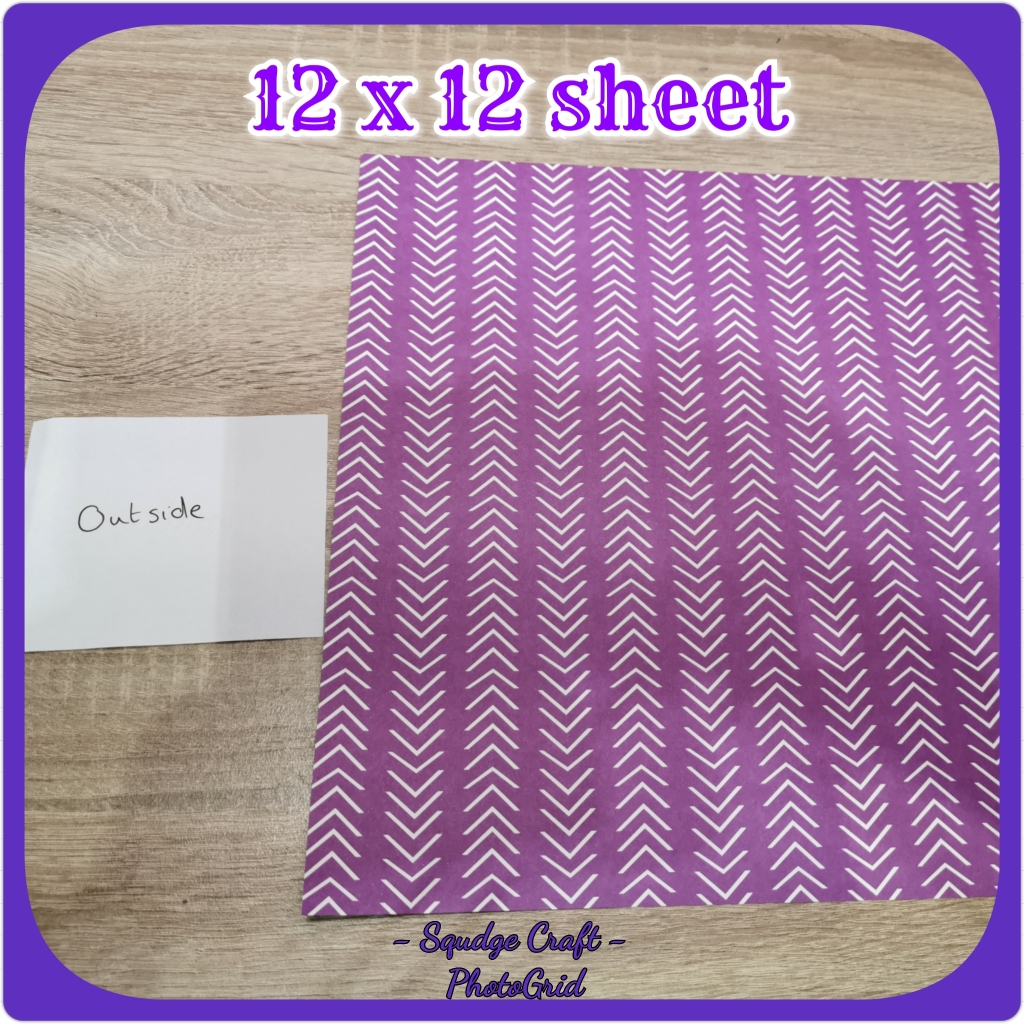
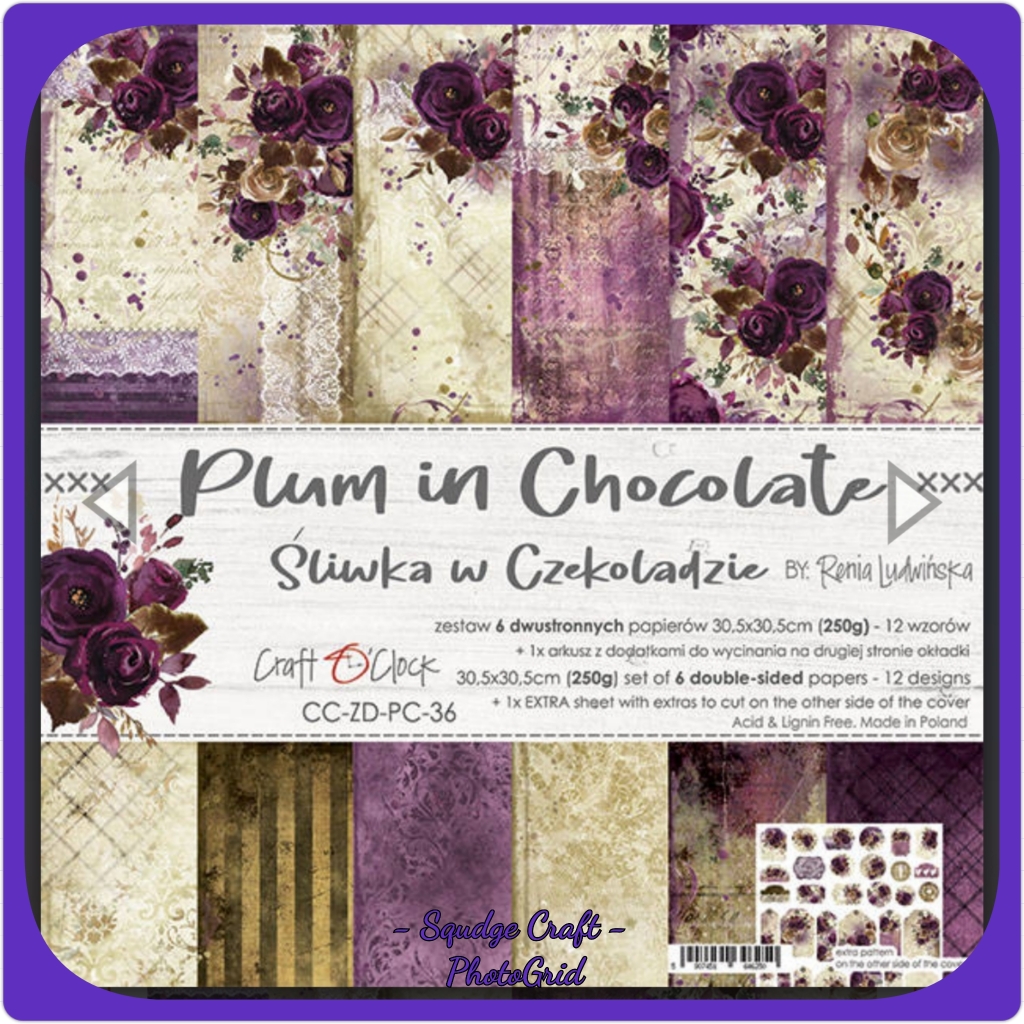
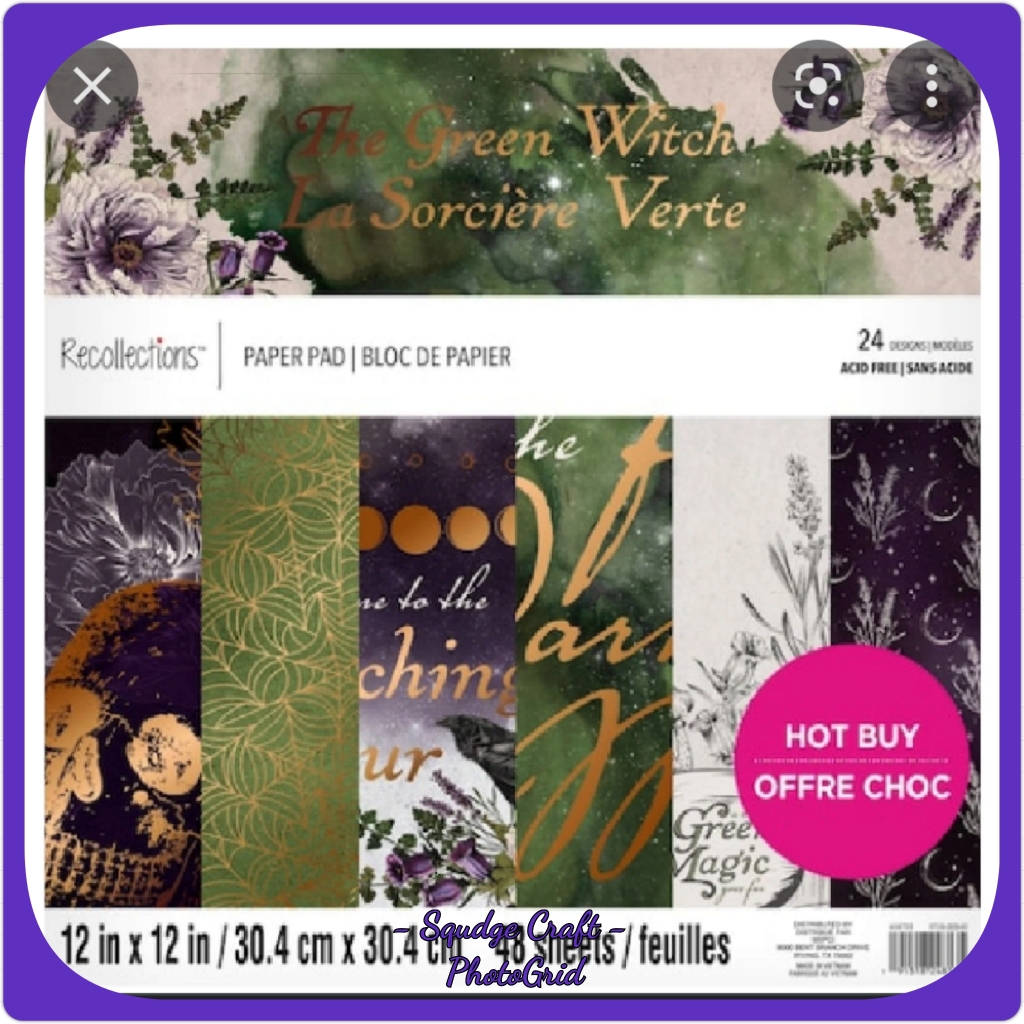
This is the paper I used – The Green Witch by Recollections.

Image showing the front cover of the 12×12 ‘Green Witch’ paper collection.

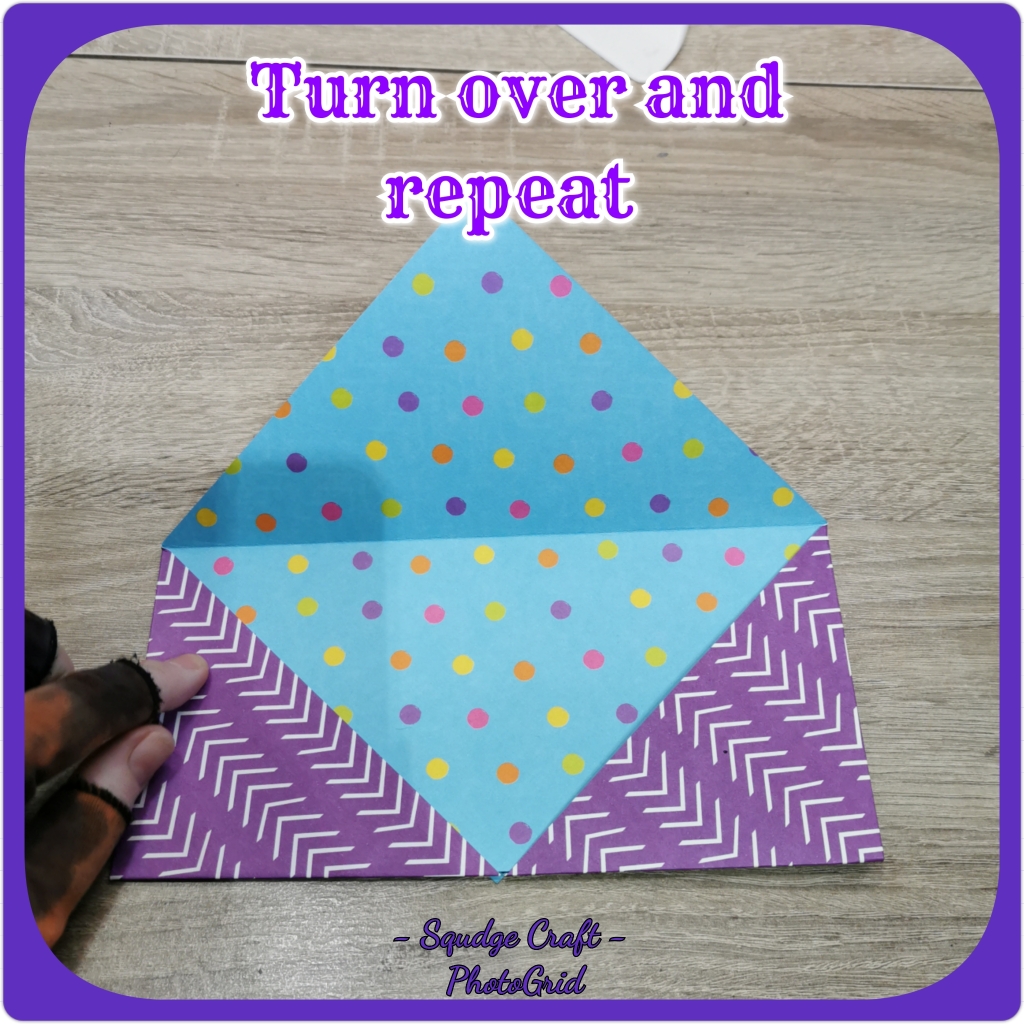
As usual, I have tried to make the album as fun and interactive as possible.

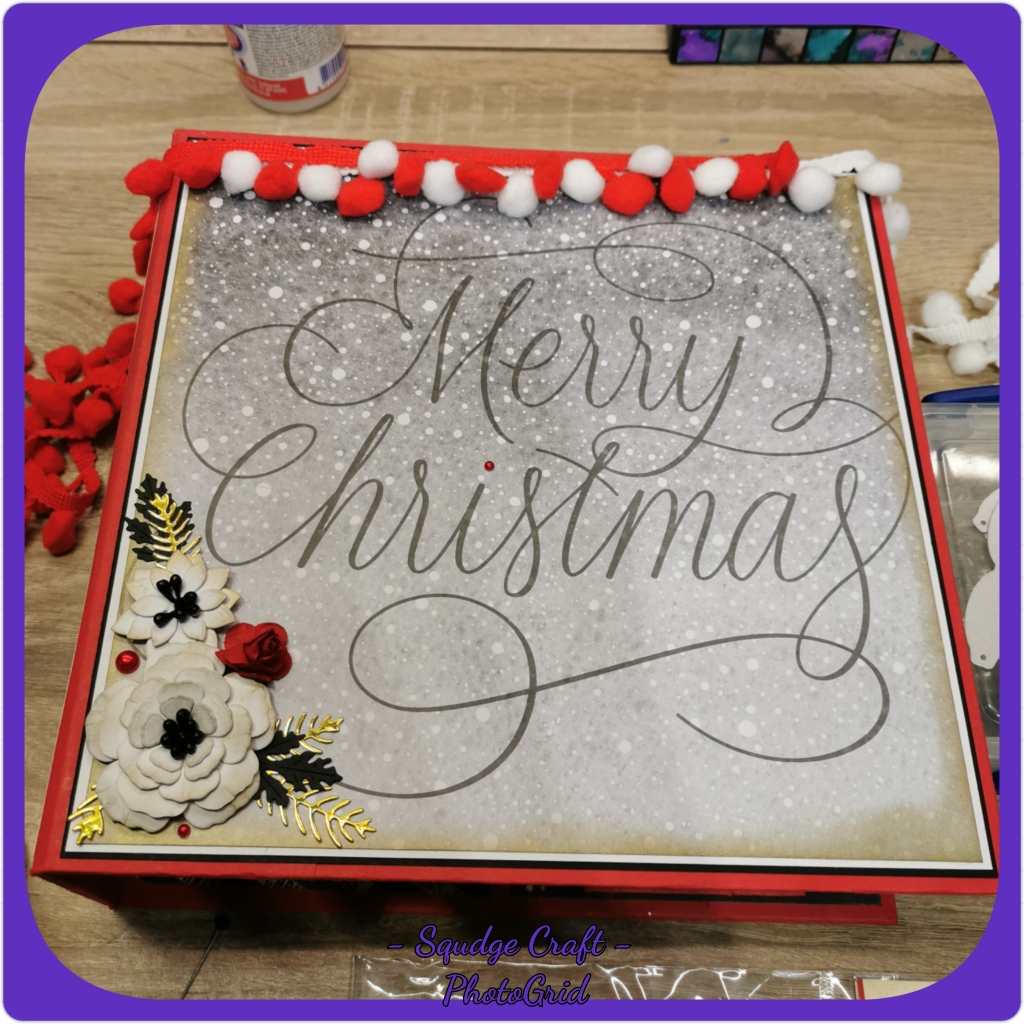
Here is the front cover, it holds a secret, but you will have to watch the video to find out what it is!

Picture shows the front cover. It has a green watercolour pattern with the words ‘The forest is dark and full of magic’ in copper foiled writing.

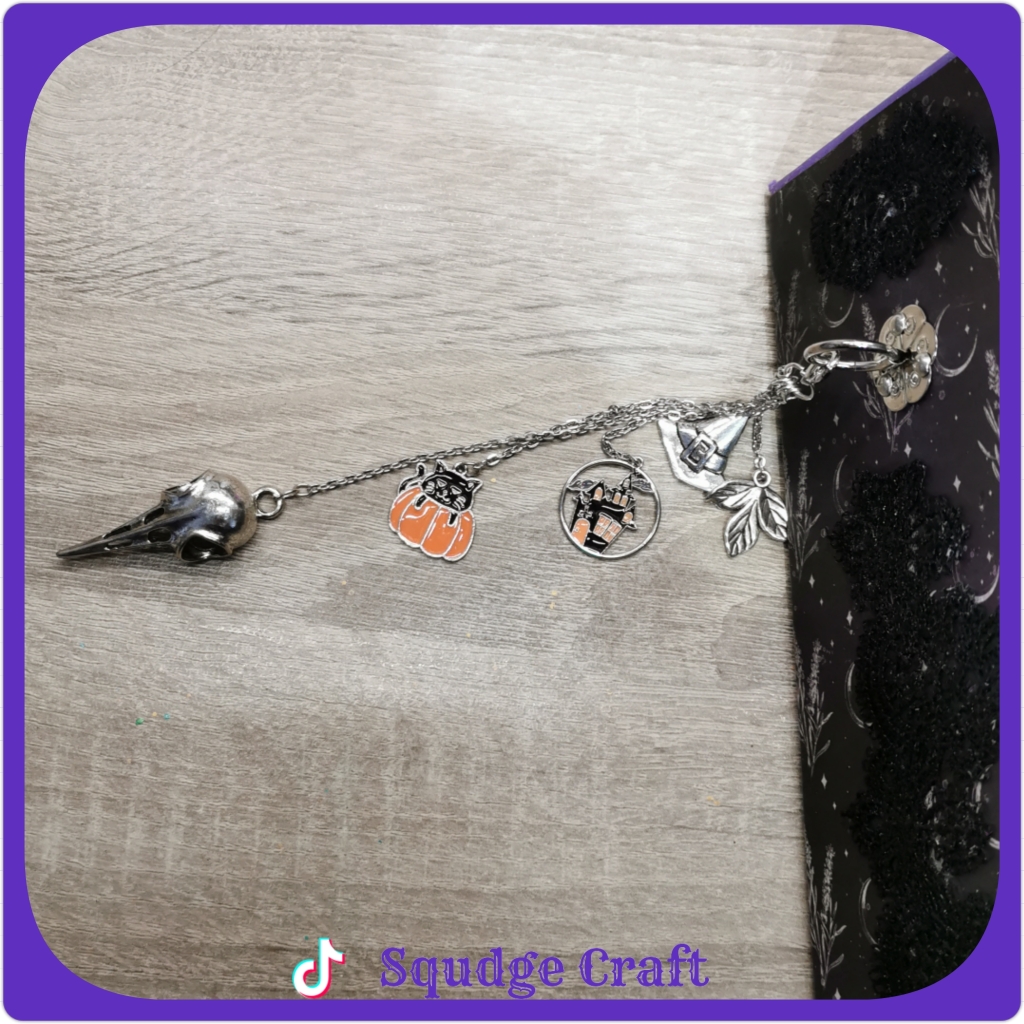
It also has these beautiful charms on the spine. Some leaves, a witches hat, a cat on a pumpkin, a witches house and a bird skull.

Image shows the 5 charms listed above.

Inside has a variety of different fun, interesting pages to explore. A waterfall, a puzzle page, several pop ups and some elements that spin!

Image shows the waterfall page.
Image shows the puzzle page.
Image shows a pop up witches house.
Image shows a waterfall that spins.
Image shows a pop up page.

I absolutely adore this paper collection, it was so easy to work with.

You can see this thing of beauty in its full glory here – https://youtu.be/lDO5A8qLOr4

I also have a quick flick through on TikTok – https://vm.tiktok.com/ZMFYr3LAr/

What do you think? This album is still available for purchase on my Ko-Fi – https://ko-fi.com/s/21c136a1ed

Keep crafting,

Squdge xx

Things to note.

Please be aware that I do occasionally use affiliate links, these are at no cost to you, but gives me a little commission which helps me to keep crafting and creating content ๐Ÿ’œ

Z fold card

Today I’m sharing this super cute animal themed thank you card.

Shows a thank you card with purple and blue paper covered in small pictures of cats and dogs.

This is a really simple card to create. You need 12×12 card for the base but can use either 12×12 or 6×6 paper to decorate.

The base is a piece of 12×6 and a piece of 12×2 inches.

Image shows a piece of purple card 12×6 and a piece of purple card 12×2.

Score both pieces of card at 3″ on the front and 6″ on the back.

Shows the purple card being scored at 3″ on the front.
Shows the purple card being scored at 6″ on the back.

You will have 2 pieces that are Z shaped. Turn the 2″ piece around.

Shows 2 pieces of Z shaped purple card.
Shows 2 pieces of Z shaped purple card. The smaller one turned to face the opposite way.

Now it’s time to decorated.

Starting with the small 2″ section. You need 3 mats. One piece of 1 3/4″ x 5 3/4″. Two pieces of 1 3/4″ x 2 3/4″.

Shows 3 pieces of paper and a pink post it note showing the sizes.
Shows the 2″ piece of purple card with the mats stuck on.

For the larger piece you also need 3 mats. One piece of 5 3/4″ x 5 3/4″. Two pieces of 5 3/4″ x 2 3/4″.

Shows 3 pieces of paper and a pink post it note showing the sizes.
Shows the 6″ piece of purple card with the mats stuck on.

This is what both pieces look like with the mats stuck on.

Shows the 6″ and the 2″ pieces of purple card with the mats stuck on.

You will also need a piece of 5 3/4″ x 5 3/4″ for the sentiment panel.

White piece of paper and a pink post it note showing the size.

You can stamp or write on the sentiment panel before sticking it on the back.

Sentiment panel with a purple sentiment and a black outline of a dog on the bottom left and a cat bottom right.

Now we are going to stick the base pieces together. You can stick this at the top, middle or bottom of the large piece. I stuck mine at the bottom.

Start with the small section of the 2″ piece. Add glue to the back and line it up with the bottom right hand side of the large piece.

Shows the small area of the 2″ piece being stuck to the front bottom right corner of the large piece.

Now the long section of the 2″ piece. I find it easier to line the pieces up and draw a pencil line on top of the small piece of card.

Add glue to the space under the pencil mark and stick the small piece on.

Shows sticking the long piece to the short section of the large piece.

Here is the finished card. You can add more decorations if you like. This card will fit into a 6×6 envelope.

Shows Z fold card pictured from the top.
Shows Z fold card pictured from the bottom.
Shows Z fold card pictured from the front.

Grab the ‘Pawsome’ paper pad here – https://craftelier.com/en-gb/paper-addicts-pawsome-prints-paper-pad-10x10cm.html?lighthousefeed_utm_source=GS+-+Google+Shopping+(Via+LighthouseFeed)&lighthousefeed_utm_medium=cpc&lighthousefeed_utm_term=38129&gclid=CjwKCAjwu5yYBhAjEiwAKXk_eJjeXK1CAuq13W-62_CenD0HnZSDENbq6EJohq16MQSBZrcPnt7I1xoCiMQQAvD_BwE

Check out my TikTok here to watch the process – https://vm.tiktok.com/ZMNvy7G92/

What do you think of this fun fold card? One you would try?

Keep crafting,

Squdge xx

Happy mail pocket

Today I am sharing this super cute happy mail pocket with you!

All you need is a 12×12 sheet of card. I. Would suggest double sided.

I used a page from this pad. Viva forever by Paper Addicts – https://amzn.to/3AeSGYr

12×12 piece of card. Purple with white chevrons. The label says ‘outside’.
12×12 piece of card. Blue with coloured polka dots. The label says ‘inside’.
12×12 piece of card being folded in half diagonally.
12×12 piece of card folded in half diagonally.
Pencil mark showing the centre point on the blue side of the 12×12 sheet.
Blue side of the 12×12 sheet. One corner of the purple side is folded over point at the centre point.
Blue side of the 12×12 sheet. Two corners of the purple side is folded over point at the centre point.
The 12×12 sheet is folded into a house shape showing both sides.
The tip of the house shape is folded down to look like an envelope.
The picture shows an envelope of the purple card with white chevrons.
The tip of the house shape is folded down to look like an envelope on the other side.
The picture shows an envelope of the purple card with white chevrons.
Purple sheet with white chevrons in a square shown with a crease down the middle.
Purple sheet with white chevrons in a square shown with a crease down the middle. Glue added along the outside edges.
Purple envelope with white chevrons. Clips on the sides to secure the glue.
One side of the envelope decorated.
Oneside of the envelope decorated.
Envelope open showing where to add goodies.
Centre pocket opened showing where to add goodies.

Here is the video instructions – https://vm.tiktok.com/ZMNWrd1m6/

What do you think, would you make one?

Keep crafting,

Lj xx

Memories of the Sea (discount codes included)

Here is an album perfect for those incredible holiday memories!

This album is made using this stunning paper collection from Fabrika Decoru.

Image shows the front cover of the ‘Memories of the Sea’ paper pad 12×12.

I really enjoyed creating this book, it made me feel like I was on a private beach. ๐Ÿ–๏ธ๐Ÿ’œ

This is now available on Ko-Fi – https://ko-fi.com/s/f006452c50

Front cover of the photo album. It’s an under water image with two dolphins swimming and the sun’s rays shining down through the water. There is a white compass in the top left corner.

If you want to get some stunning paper of your own, follow this link to Crafty Wizard and get 10% off!! https://i.refs.cc/FW84aEmg?smile_ref=eyJzbWlsZV9zb3VyY2UiOiJzbWlsZV91aSIsInNtaWxlX21lZGl1bSI6IiIsInNtaWxlX2NhbXBhaWduIjoicmVmZXJyYWxfcHJvZ3JhbSIsInNtaWxlX2N1c3RvbWVyX2lkIjo0NzcyODI4NDJ9

You can see this beachy beauty here – https://youtu.be/mv69t0JiunU

I also added a speed run through on my other socials.

TikTok – https://vm.tiktok.com/ZMNgHMdXg/?k=1

Instagram – https://www.instagram.com/reel/Cg9DLEWDqMm/?igshid=YmMyMTA2M2Y=

Facebook – https://www.facebook.com/100063703835308/posts/pfbid0RMdGJ98y9wJ2UmSqzek7jL1VzyherXxkxVXYuqULYPdydf57kyzTN6eQxPPMzJfql/

Here are some of the products that I used.

White 12×12 card – https://amzn.to/3oS1TAB

Art glitter glue – https://amzn.to/3wE5ENM

Collall glue – https://amzn.to/3yPHF0S

12x1mm magnets – https://amzn.to/3uZOeuZ

Ergonomic bone folder – https://amzn.to/3LFr8zm

Paper trimmer – https://amzn.to/3sPpVih

12×12 score board – https://amzn.to/3yOL6ER

Beach themed metal charms – https://amzn.to/3oPRXaP

What do you think of this one?

Keep crafting,

Squdge xx

Things to note.

Please be aware that I do occasionally use affiliate links, these are at no cost to you, but gives me a little commission which helps me to keep crafting and creating content ๐Ÿ’œ

Bee Happy Dovecraft

Today I am sharing this super cute 6×6 beginner friendly mini album.

Front of 6×6 inch album. The paper is a gold foil honeycoombe design with some decorative stickers showing images of bees.

This is the awesome paper collection I used, I had the 6 paper pad, the puffy stickers and the bee charms.

Here is the front cover of the 6×6 paper collection ‘Bee Happy’.

You can watch the full walk through of this album here – https://youtu.be/Wcq-YO-pafM

I also created a tutorial which is out today – https://youtu.be/ZN98f5J2A2A

This album is the perfect way to get into creating mini albums, it shows all the basics, page design, flaps, pockets, pull outs, hinges and how to build the cover.

Additionally, it’s only 6×6 so if you don’t enjoy it then you won’t have used up too many resources. This album is created using 8 12×12 pages, 2 A4 sheets (or letter paper) to wrap the cover and whatever design paper you want to decorate with.

Here are the items I used to create this beautiful mini album:

Kraft card 12×12 – https://amzn.to/3LI3n9C

A4 kraft card – https://amzn.to/3lre063

Dovecraft Bee Happy 6×6 – https://amzn.to/3sUGwkx

Dovecraft Bee Happy 12×12 – https://amzn.to/3wM75cX

Dovecraft Bee Happy puffy stickers – https://amzn.to/3LD6hfL

Dovecraft Bee Happy bee charms – https://amzn.to/3z035Z0

Double sided tape – https://amzn.to/3G2qv1x

Art glitter glue – https://amzn.to/3wE5ENM

Paper trimmer – https://amzn.to/3sPpVih

Ergonomic bone folder – https://amzn.to/3LFr8zm

12×12 score board – https://amzn.to/3yOL6ER

What do you think about this one? Isn’t it adorable?! ๐Ÿ๐Ÿ๐Ÿ

Keep crafting,

Squdge xx

Things to note.

Please be aware that I do occasionally use affiliate links, these are at no cost to you, but gives me a little commission which helps me to keep crafting and creating content ๐Ÿ’œ

Plum in chocolate (discount code inside!)

Oh my gosh these papers ๐Ÿ’œ๐Ÿ’œ๐Ÿ’œ๐Ÿ’œ

Front cover of the 12×12 ‘Plum in Chocolate’ paper pad.

These stunning papers are the perfect way to display your memories in this large lapbook – it will hold up to 200 photos!

I created this beautiful lapbook using these papers and it turned out so elegant and grown up! The perfect place to store wedding or anniversary photos. Or even a milestone birthday!

A lapbook is a combination of a folio and an album, it contains elements of both designs.

You can watch the full walk through of this incredible lapbook on YouTube here – https://youtu.be/shcr0QNP2y4

This is also now available to purchase on my Ko-Fi – https://ko-fi.com/s/e64fd7bc29

I purchased this paper collection from Crafty Wizard. I got the 12×12, 8×8, 6×6 and the chipboard pieces.

If you want to get some stunning paper of your own, follow this link to Crafty Wizard and get 10% off!! https://i.refs.cc/FW84aEmg?smile_ref=eyJzbWlsZV9zb3VyY2UiOiJzbWlsZV91aSIsInNtaWxlX21lZGl1bSI6IiIsInNtaWxlX2NhbXBhaWduIjoicmVmZXJyYWxfcHJvZ3JhbSIsInNtaWxlX2N1c3RvbWVyX2lkIjo0NzcyODI4NDJ9

I also used the following items:

Art glitter glue – https://amzn.to/3wE5ENM

Collall glue – https://amzn.to/3yPHF0S

Fabritac glue – https://amzn.to/3yWIuoD

Paper fasteners / split pins / brads – https://amzn.to/3cp1G4R

Jute string – https://amzn.to/3OiL10r

A4 kraft card – https://amzn.to/3lre063

Black 12×12 card – https://amzn.to/382Apn4

Black envelopes – https://amzn.to/3RLDNVC

Gold card – https://amzn.to/3ctSYCM

Purple ribbon – https://amzn.to/3OeasQx

Gold ribbon – https://amzn.to/3oaC4eO

Magnets – https://amzn.to/3uZOeuZ

Pokey tool / hook – https://amzn.to/3PErV6H

Large ergonomic paper folder – https://amzn.to/3LFr8zm

Mechanical pencil – https://amzn.to/3NuPEoa

Paper trimmer – https://amzn.to/3sPpVih

Ergonomic scissors small – https://amzn.to/3PxQhyZ

Ergonomic scissors large – https://amzn.to/3PHHLNK

12×12 score board – https://amzn.to/3yOL6ER

Glue eraser – https://amzn.to/3ltZudL

Mono sand eraser – https://amzn.to/3PyLEVh

I think that’s all the tools, I hope this isn’t too much information for you all at once ๐Ÿ’œ

What do you think? Which memories would you store here?

Keep crafting,

Squdge xx

Things to note

Please be aware that I do occasionally use affiliate links, these are at no cost to you, but gives me a little commission which helps me to keep crafting and creating content ๐Ÿ’œ

Christmas in July?!

Square book cover in red. With a black and white layer saying ‘Merry Christmas’. Red and white mini pom poms run along the top.

This beauty was a challenge because the papers were black and white, with a hint of gold. So I thought the red paper base would really make everything pop!

I like creating themes in my albums, so you will find a present page, specifically for Christmas in here!

I made this back in December over on Twitch (like YouTube but everything is live) – you should come join us there. Twitch.tv/squdge_craft

You can watch a full flip through of this album here on YouTube – https://youtu.be/gDpVpWkczaM

Watch a quick flip through here – https://vm.tiktok.com/ZMNasba91/?k=1

Or here – https://hover.gg/app/posts/1254906

I’m really new to Hover so if you are there please come say hi ๐Ÿ’œ๐Ÿ’œ

What do you think of the album? Also, do you do Christmas in July? Why?

Keep crafting,

Squdge xx

Things to note.

Please be aware that I do occasionally use affiliate links, these are at no cost to you, but gives me a little commission which helps me to keep crafting and creating content ๐Ÿ’œ

Wedding roses

I am always so honoured when trusted to preserve these precious memories, and this was no exception.

My cousin contacted me regarding his best friend’s wedding and her wedding flowers. Unfortunately, there has been a mix up with her actual bouquet, but he had photos.

Photo of the wedding flowers. White roses, babies breath and asparagus fern.
Bride holding a bouquet of white roses, babies breath, asparagus fern and other greens.

I went to the florist and purchased the roses and babies breath ready to be preserved.

I use silica to preserve the flowers, it works like a charm to preserve the colour and shape of the flowers. https://amzn.to/3OgPUaG

After 2-3 weeks in the silica, the flowers came out beautifully ๐Ÿ’œ completely dried and ready for the resin.

Now for the fun stuff! My cousin requested two letters, an ‘N’ & an ‘O’. I also created a large cube so that I could include a fully opened rose.

Black silicone molds ‘N’ and ‘O’ are backwards. Each contain resin and flowers.
Black silicone molds ‘N’ and ‘O’ are backwards. Each contain resin, flowers and leaves. Also contain a purple Squdge Craft logo.

Once the resin had fully cured, it was time to demould them, this is always the best part!

Letter ‘N’ containing a white rose bud, babies breath and greenary.
Letter ‘O’ containing a white rose bud, babies breath and greenary.
Cube containing two full white roses, babies breath and greenary.
Letter ‘N’ containing a white rose bud, babies breath and greenary. Letter help up to the sky to show how clear it is.
Letter ‘O’ containing a white rose bud, babies breath and greenary. Letter help up to the sky to show how clear it is.
Cube containing two full white roses, babies breath and greenary. Cube help up to the sky to show how clear it is.

What do you think?! I just love how clear the pieces came out ๐Ÿ’œ

Keep crafting,

Squdge xx

Things to note.

Please be aware that I do occasionally use affiliate links, these are at no cost to you, but gives me a little commission which helps me to keep crafting and creating content ๐Ÿ’œ

Family Tree folio

So I have recently become really interested in my family tree and taking over where my nan left off.

I created one of these for my aunt, and I loved it so much I instantly created one for myself!!

I used this stunning paper from Scrap Mir – Family Tree, which I purchased from Crafty Wizard.

Here is the front cover of the 12×12 paper pad for the Family Tree collection.

If you want to get some stunning paper of your own, follow this link to Crafty Wizard and get 10% off!! https://i.refs.cc/FW84aEmg?smile_ref=eyJzbWlsZV9zb3VyY2UiOiJzbWlsZV91aSIsInNtaWxlX21lZGl1bSI6IiIsInNtaWxlX2NhbXBhaWduIjoicmVmZXJyYWxfcHJvZ3JhbSIsInNtaWxlX2N1c3RvbWVyX2lkIjo0NzcyODI4NDJ9

Black card I used as the base – https://amzn.to/3NHcSak

My favourite glues:

Art glitter glue – https://amzn.to/3NuBq6n

Collall glue – https://amzn.to/3yPHF0S

My design idea was to make both sides identical in layout but use different papers to create one side for my dad’s family and the other one for my nans.

In the centre I have one page for my family if and when I have children, but I also added another page for my chosen family – the friends who are always there for me.

You can watch the full how to over on YouTube

Part 1 – https://youtu.be/3ubRg_GaIpw

Part 2 – https://youtu.be/3ubRg_GaIpw

Part 3 – https://youtu.be/FJydnItEcO0

If you want to just see the walk through go to 29:37 on this video – https://youtu.be/FJydnItEcO0

You can see a speed flip through on TikTok too – https://vm.tiktok.com/ZMNkfasX7/?k=1

Or Facebook – https://fb.watch/d_9QqDRfQd/

Or even Instagram – https://www.instagram.com/reel/CfaYMRoquIO/?igshid=YmMyMTA2M2Y=

What do you think of this incredible folio? Perfect for storing all the memorabilia you find when collating your family tree ๐Ÿ’œ

Keep crafting,

Squdge xx

Things to note.

Please be aware that I do occasionally use affiliate links, these are at no cost to you, but gives me a little commission which helps me to keep crafting and creating content ๐Ÿ’œ

And the final 2!!!

Have you enjoyed these pride flag posts? I was learning so much as I created them, you are never too old to learn! I know there are many more flags, but these are my final 2.

Today I am sharing the Intersex Pride flag and the Drag Pride flag inspired pieces.

Intersex Pride flag inspired round dot art. Yellow with a purple ring.
Heart shaped dot mandala using the colours from the Drag Pride flag – purple, white and blue, with a pink centre.

These are my final pride pieces, but I will be sharing the processes on other social media soon – check them out here – https://linktr.ee/squdgecraft

There are some other rainbow dot creations I made live on Twitch, feel free to join us โ€“ https://www.twitch.tv/squdge_craft

If you would ever like to purchase any of these items please check out my Ko-Fi โ€“ https://ko-fi.com/squdgecraft

Here are the goodies I used to create this beautiful piece ๐Ÿ’œ๐Ÿ’œ

Black gesso โ€“ https://amzn.to/3GWT80D

Acrylic paint โ€“ https://amzn.to/3LPjJx7

Paint pallet โ€“ https://amzn.to/3PXbwKG

Dotting rods coloured โ€“ https://amzn.to/3mmio6U

Dotting rods โ€“ https://amzn.to/3xpOK6Q

Dotting stylus โ€“ https://amzn.to/3tifggd

Dotting starter kit โ€“ https://amzn.to/3mn5NAe

Clear ruler โ€“ https://amzn.to/3xaAaPB

Chalk pencil โ€“ https://amzn.to/3aqtB3z

Mechanical chalk pencil โ€“ https://amzn.to/3avGNEa

Protractor โ€“ https://amzn.to/3Q2uAHA

Mini protractor thingy โ€“ https://amzn.to/3xkLFFl

Compass โ€“ https://amzn.to/3NtB0O4

Happy Pride to all my LGBTQ+ peeps ๐ŸŒˆ๐ŸŒˆโค๏ธ๐Ÿงก๐Ÿ’š๐Ÿ’™๐Ÿ’œ๐Ÿ’—๐ŸคŽ๐Ÿ–ค๐Ÿค

Keep crafting!

Squdge xx

Things to note.

Please be aware that I do occasionally use affiliate links, these are at no cost to you, but give me a little commission to help me keep creating.

Design a site like this with WordPress.com
Get started